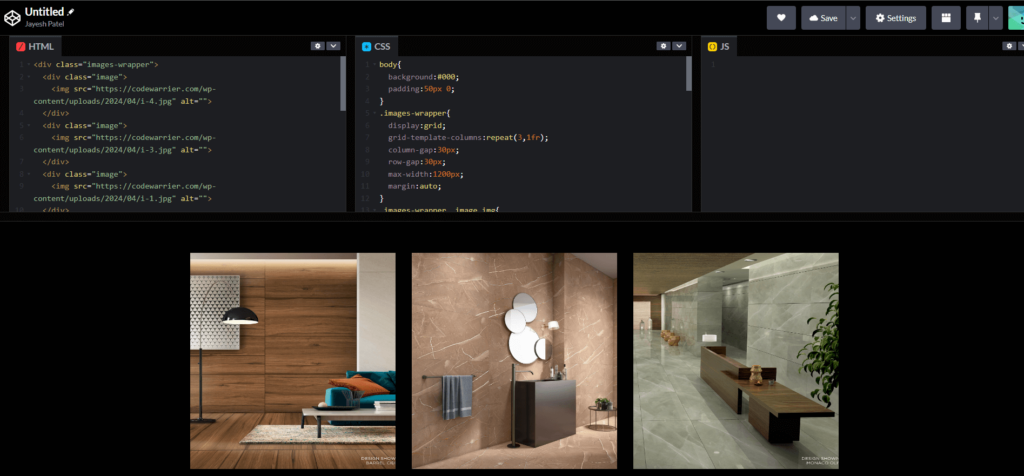
Image Hover Effect
Here, we create image hover effect using HTML and CSS.
Project Folder Structure
Before we start coding we take a look at the project folder structure. We start by creating a folder called – “Image Hover Effect” Inside this folder, we have 2 files. Create these files like below:
- index.html
- style.css
HTML
We create image hover effect using HTML code. Copy the code below and paste it into your index.html file.
					<div class="images-wrapper">
  <div class="image">
    <img decoding="async" src="https://codewarrier.com/wp-content/uploads/2024/04/i-4.jpg" alt="">
  </div>
  <div class="image">
    <img decoding="async" src="https://codewarrier.com/wp-content/uploads/2024/04/i-3.jpg" alt="">
  </div>
  <div class="image">
    <img decoding="async" src="https://codewarrier.com/wp-content/uploads/2024/04/i-1.jpg" alt="">
  </div>
  <div class="image">
    <img decoding="async" src="https://codewarrier.com/wp-content/uploads/2024/04/i-1.jpg" alt="">
  </div>
  <div class="image">
    <img decoding="async" src="https://codewarrier.com/wp-content/uploads/2024/04/i-4.jpg" alt="">
  </div>
  <div class="image">
    <img decoding="async" src="https://codewarrier.com/wp-content/uploads/2024/04/i-3.jpg" alt="">
  </div>
</div>
CSS
We create image hover effect using CSS code. Copy the code below and paste it into your style.css file.
					body{
  background:#000;
  padding:50px 0;
}
.images-wrapper{
  display:grid;
  grid-template-columns:repeat(3,1fr);
  column-gap:30px;
  row-gap:30px;
  max-width:1200px;
  margin:auto;
}
.images-wrapper .image img{
  width:400px;
  height:400px;
}
.images-wrapper .image{
  position:relative;
  overflow:hidden;
}
.images-wrapper .image::before{
    position: absolute;
    top: 0;
    left: -100%;
    content: '';
    width: 50%;
    height: 100%;
    background: -o-linear-gradient(left, rgba(255, 255, 255, 0) 0%, rgba(255, 255, 255, .3) 100%);
    background: -webkit-gradient(linear, left top, right top, from(rgba(255, 42556, 255, 0)), to(rgba(255, 255, 255, .3)));
    background: linear-gradient(to right, rgba(255, 255, 255, 0) 0%, rgba(255, 255, 255, .3) 100%);
    -webkit-transform: skewX(-25deg);
    -ms-transform: skewX(-25deg);
    transform: skewX(-25deg);
  opacity:0;
}
.images-wrapper .image:hover::before{
  -webkit-animation:shine 1s;
  animation:shine 1s;
  opacity:1;
}
@keyframes shine{
  100%{
    left:125%;
  }
}
CODEPEN

Watch Some Other Topics
